 Tweet
Tweet
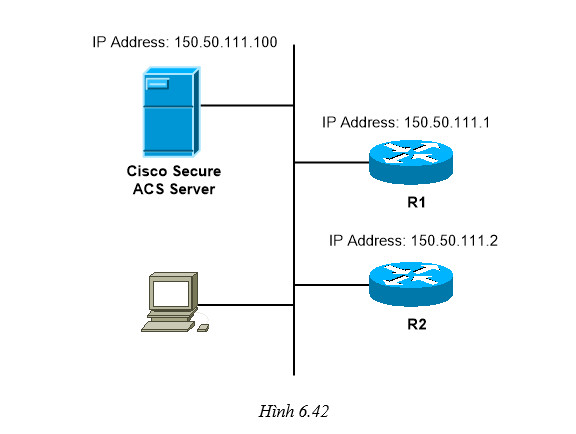
Dùng sơ đồ mạng như hình 6.46.
 A) Cấu hình trên Router
sh run
Building configuration...
Current configuration: 1905 bytes
!
version 12.2
service timestamps debug datetime msec
service timestamps log datetime msec
no service password-encryption
!
hostname R1
!
logging queue-limit 100
!
username loc8 privilege 8 password 0 loc8
username loc7 privilege 7 password 0 loc7
memory-size iomem 10
aaa new-model
!
!
aaa authentication login default group tacacs+ local
aaa authentication login nopass none
aaa authorization exec default group tacacs+ local
aaa authorization exec nopass none
aaa accounting exec default start-stop group tacacs+
aaa accounting commands 8 default start-stop group tacacs+
aaa accounting connection default start-stop group tacacs+
aaa accounting system default start-stop group tacacs+
aaa session-id common
ip subnet-zero
!
no ip domain lookup
!
ip dhcp pool 192.168.1.0
!
mpls ldp logging neighbor-changes
!
!
interface Ethernet0/0
ip address 192.168.1.199 255.255.255.0
half-duplex
!
!
tacacs-server host 192.168.1.200 single-connection
tacacs-server directed-request
tacacs-server key cisco
radius-server authorization permit missing Service-Type
!
mgcp profile default
!
dial-peer cor custom
!
!
privilege configure level 8 service-policy
privilege configure level 8 ip dhcp pool
privilege configure level 8 ip dhcp
privilege configure level 8 ip
privilege configure level 8 service dhcp
privilege configure level 8 service
privilege exec level 8 configure terminal
privilege exec level 8 configure
privilege exec level 7 show startup-config
privilege exec level 8 show running-config
privilege exec level 7 show
!
end
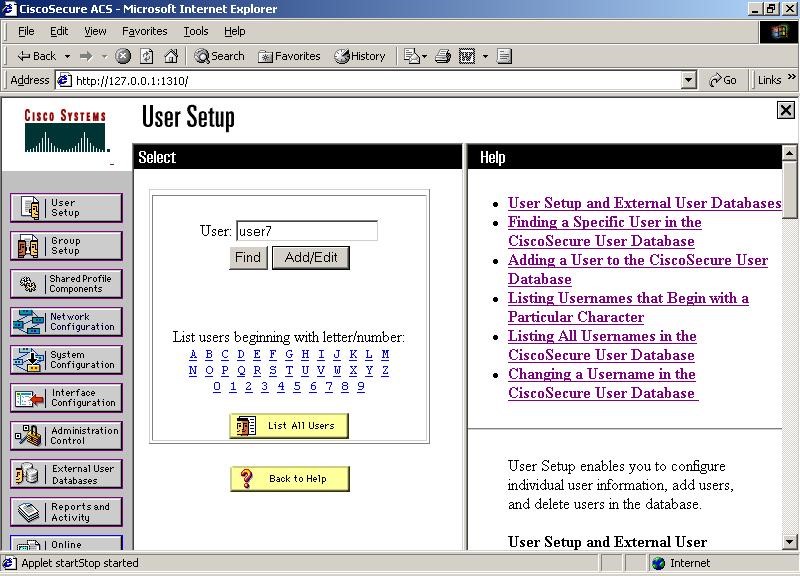
Trên server Cisco Secure ACS, thực hiện các bước như sau.
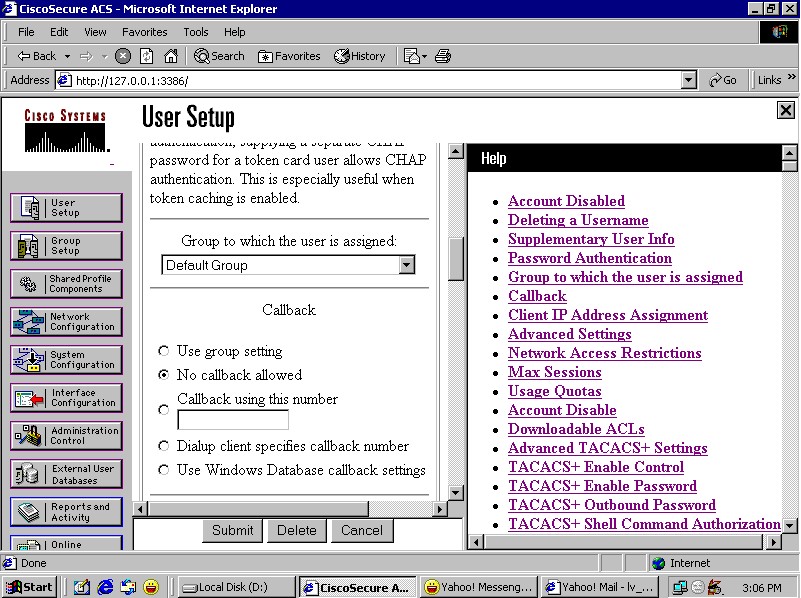
- Tạo ra một username trong menu user setup:
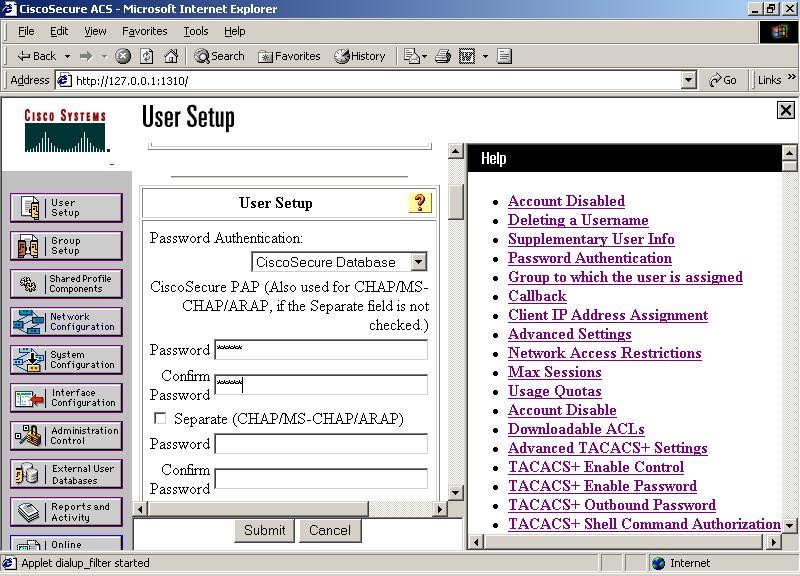
- Gán password cho user.
- Gán người dùng vào nhóm phù hợp. Xem hình vẽ bên dưới.
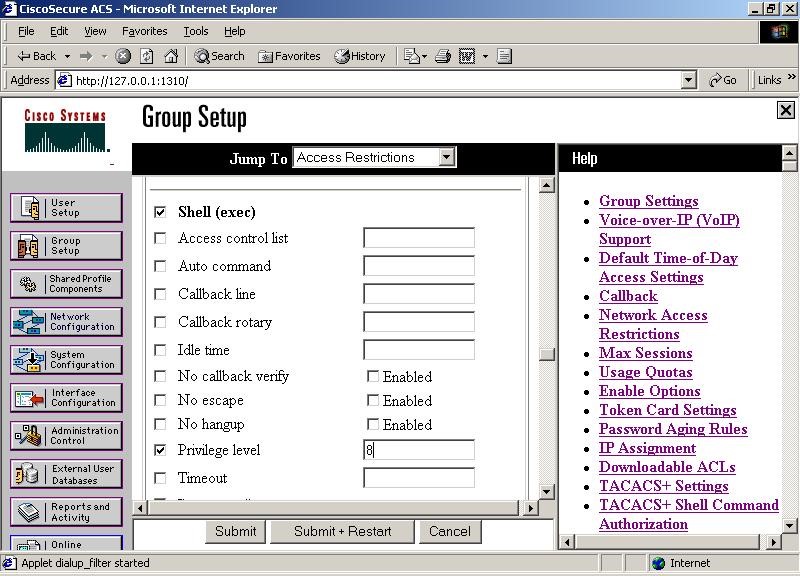
- Gán privilege level cho nhóm

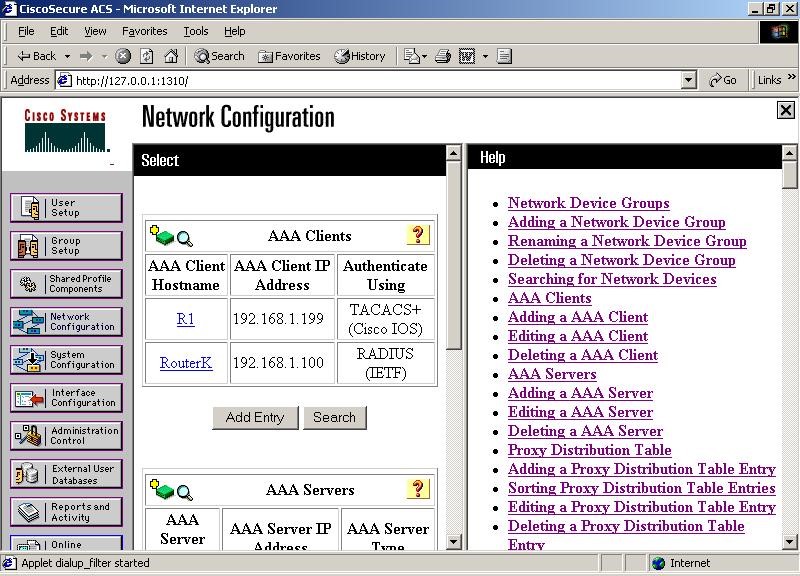
Vào menu network config, thêm vào AAA Client, chú ý chọn TACacs+ hay Radius cho từng client. Chú ý địa chỉ IP là địa chỉ của các router.
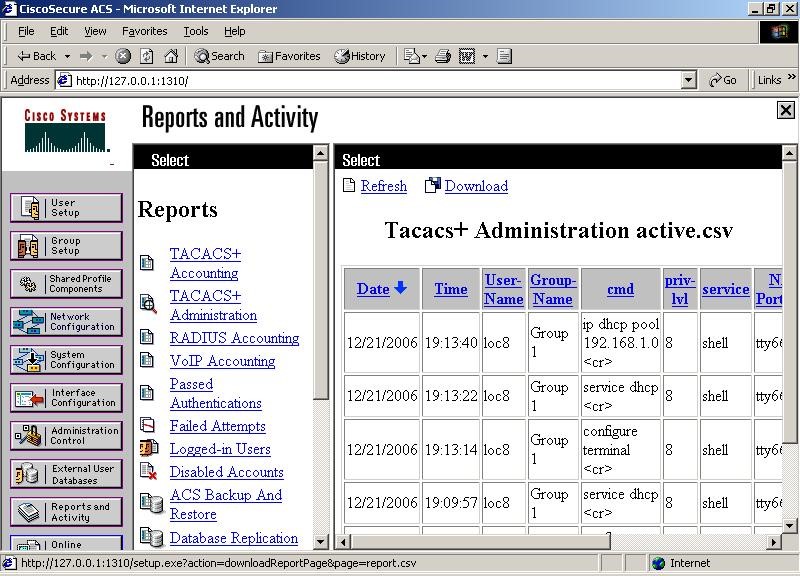
Xem thông tin Accounting trên AAA server trong menu report and activity
 B) Cấu hình AAA authorization
- Trước hết phải bật acs lên trước
- Enable aaa.
- Trước hết ta phải xác thực trước:
- Sau đó mới cấp quyền cho user
Các bước thực hiện
- enable aaa:
router(config)#aaa new-model
router(config)#tacacs-server host ip-address: địa chỉ là địa chỉ của tacacs server.
router(config)#tacacs-server key key: Key được cấu hình tương ứng trên server.
- Xác thực cho phép user login bằng lệnh sau:
router(config)#aaa authentication login default group tacacs+ local: lệnh này thực hiện việc xác thực đến server trước, nếu không thành công thì trở về xác thực local.
- Việc cấp quyền cho user được tiến hành như sau:
- Ở router thì ta phải tạo các privilege level. Ví dụ:
router(config)#privilege configure level 7 snmp-server host
router(config)#privilege configure level 7 snmp-server
router(config)#privilege exec level 7 ping
router(config)#privilege exec level 7 configure terminal
router(config)#privilege exec level 7 configure
- Cho phép user vào privilege exc mode
router(config)#aaa authorization exec default group tacacs+ local
- Xác định các command cho phép bởi các privilege level.
router(config)#aaa authorization commands 7 default group tacacs+ local
Cấu hình cho sơ đồ sau:
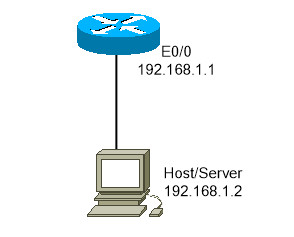
Hình 6.49
Trong bài này ta sẽ cấu hình máy có địa chị 192.168.1.2 làm server đồng thời làm host để kiểm tra.
Cấu hình router:
show run
Building configuration...
Current configuration: 1411 bytes
!
version 12.2
service timestamps debug datetime msec
service timestamps log datetime msec
no service password-encryption
!
hostname R1
!
logging queue-limit 100
enable password cisco
!
username vancuong password 0 vancuong
username R1 privilege 7 password 0 cisco
aaa new-model
!
aaa authentication login default group tacacs+ local
aaa authorization exec default group tacacs+ local
aaa authorization commands 0 default group tacacs+ local
aaa authorization commands 7 default group tacacs+ local
aaa authorization commands 15 default group tacacs+ local
aaa session-id common
ip subnet-zero
!
no ip domain lookup
!
mpls ldp logging neighbor-changes
!
no voice hpi capture buffer
no voice hpi capture destination
mta receive maximum-recipients 0
!
interface Ethernet0/0
ip address 192.168.1.1 255.255.255.0
half-duplex
!
interface Serial0/0
no ip address
shutdown
!
ip http server
ip classless
!
tacacs-server host 192.168.1.2
tacacs-server directed-request
tacacs-server key cisco
radius-server authorization permit missing Service-Type
call rsvp-sync
!
mgcp profile default
!
dial-peer cor custom
!
privilege configure level 7 snmp-server host
privilege configure level 7 snmp-server
privilege exec level 7 ping
privilege exec level 7 configure terminal
privilege exec level 7 configure
!
line con 0
logging synchronous
line aux 0
line vty 0 4
!
End
Cấu hình cho server:
- Tạo client:
- Vào Network Configuration: Trong mục AAA client click vào Add entry.
- Nhập các thong tin của router client. Chú ý là key phải trùng với key cấu hình trên router
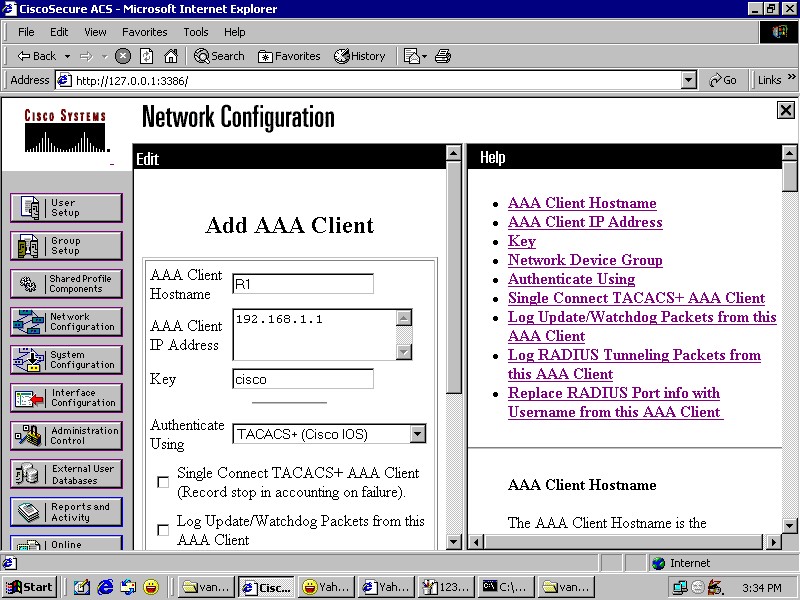
Hình 6.50
- Sau khi submit thì yêu cầu reset: ta vào System Configuration chọn tiếp Service Control nhấn restart.
- Tạo user: vào user setup, nhập username cần tạo nhấn Add/Edit, sau đó thì nhập password. Chú ý là user thuộc group nào, ví dụ là user khanh, chú ý là user được tạo thuộc group nào. ở đây là default group.
- Tạo authorization cho các user thuộc group theo trình tự sau:
- Vào group setup chọn edit.
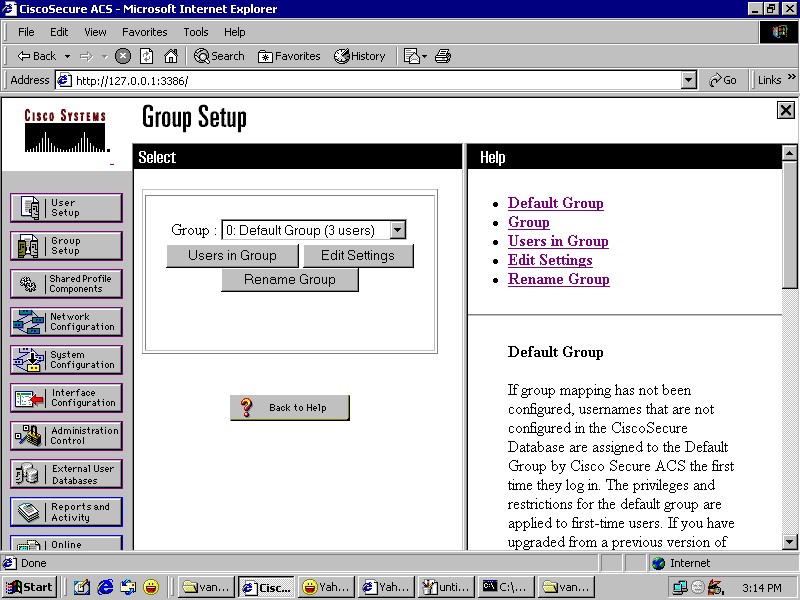
Hình 6.52
- Chọn Shell(exec) để cho phép user ở privilege level nào.
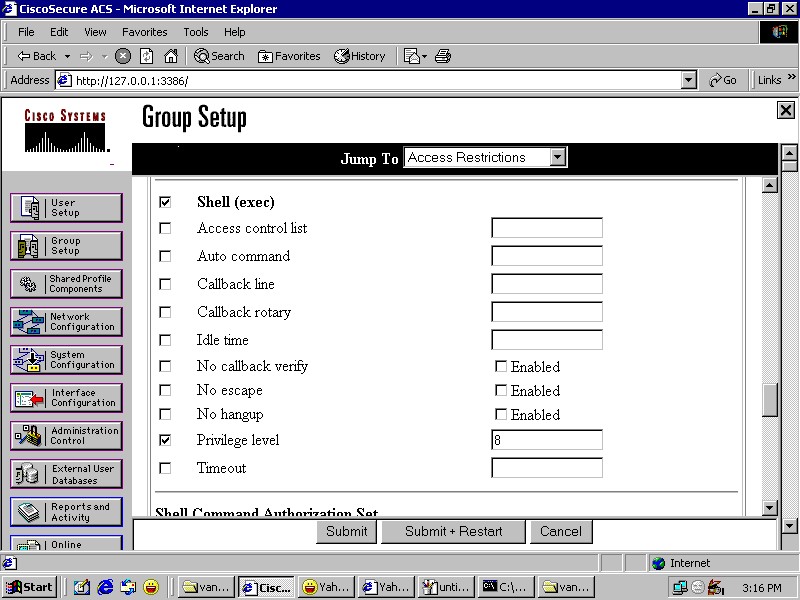
Hình 6.53
- Chọn Per Group Command Authorization: Chú ý là ở đây ta chỉ thực hiện từng command môt, muốn có nhiều command thì phải submit sau đó tiếp tục bước trên để tạo command, ví dụ ở đây là lệnh ping.
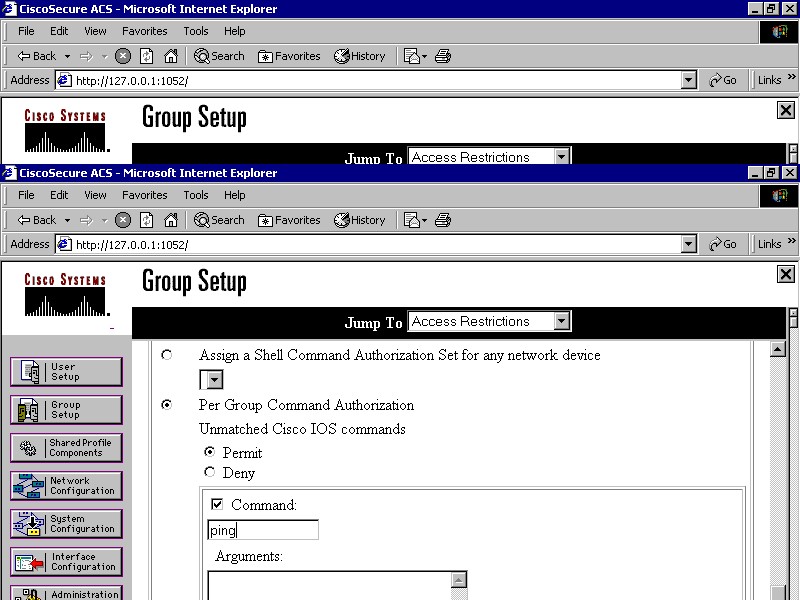
Hình 6.54
- Sau khi thực hiện xong thì yêu cầu reset như đã trình bày trên phần tạo client.
Kiểm tra kết quả:
- Telnet vào router: nhập username, password.
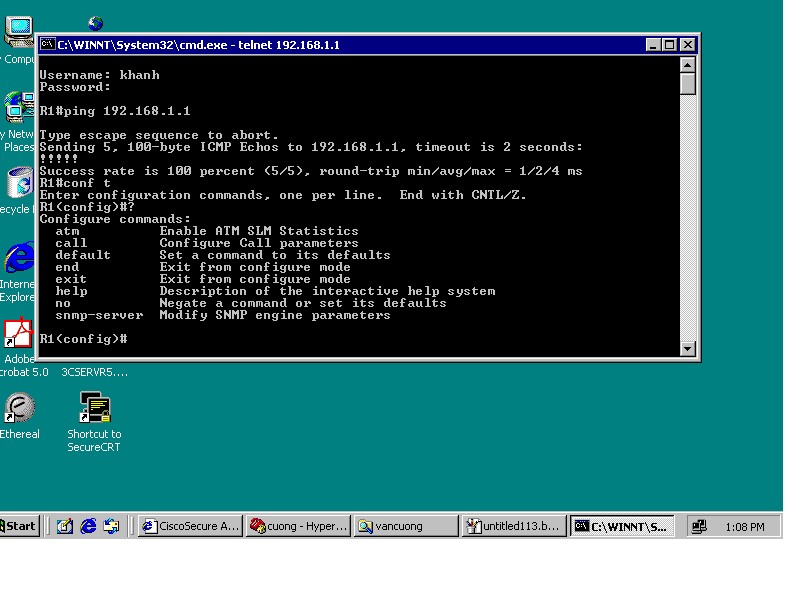
Hình 6.55
- Ở router thì debug lên để xem: debug aaa authen, và authorization.