Tweet
Tweet
R2#sh run
Building configuration…
Current configuration : 1551 bytes
!
version 12.3
service timestamps debug datetime msec
service timestamps log datetime msec
no service password-encryption
!
hostname R2
!
boot-start-marker
boot-end-marker
!
enable password cisco
!
no aaa new-model
!
resource policy
!
mmi polling-interval 60
no mmi auto-configure
no mmi pvc
mmi snmp-timeout 180
ip subnet-zero
ip cef
!
!
no ip dhcp use vrf connected
!
!
no ip domain lookup
no ip ips deny-action ips-interface
!
no ftp-server write-enable
!
!
crypto isakmp policy 1
hash md5
authentication pre-share
crypto isakmp key 6 cisco123 address 192.168.1.1
crypto isakmp keepalive 30 5
no crypto isakmp ccm
!
!
crypto ipsec transform-set myset esp-3des esp-md5-hmac
!
crypto dynamic-map mymap 10
set transform-set myset
!
!
crypto map mainmap 1 ipsec-isakmp dynamic mymap
!
!
!
interface Loopback0
ip address 192.168.255.1 255.255.255.0
interface Loopback1
ip address 2.2.2.2 255.255.255.255
interface FastEthernet0/0
ip address 192.168.1.2 255.255.255.0
duplex auto
speed auto
crypto map mainmap
interface FastEthernet0/1
no ip address
shutdown
duplex auto
speed auto
!
ip classless
ip route 0.0.0.0 0.0.0.0 192.168.1.1
!
!
ip http server
no ip http secure-server
!
!
control-plane
!
line con 0
logging synchronous
line aux 0
line vty 0 4
no login
warm-reboot
end
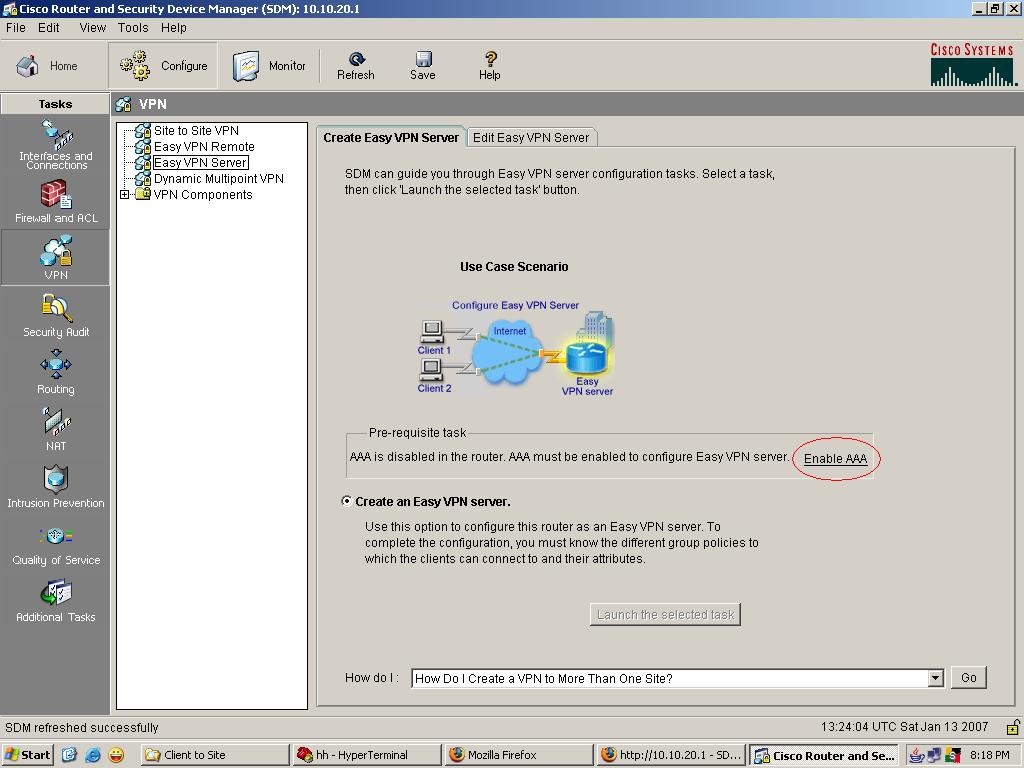
Bước 1: Kích hoạt VPN Client to Site ( phải enable AAA Server)
 Bước 2:
 Bước 3: Tạo ít nhất 1 user mode 15 (để kích hoạt AAA Server)

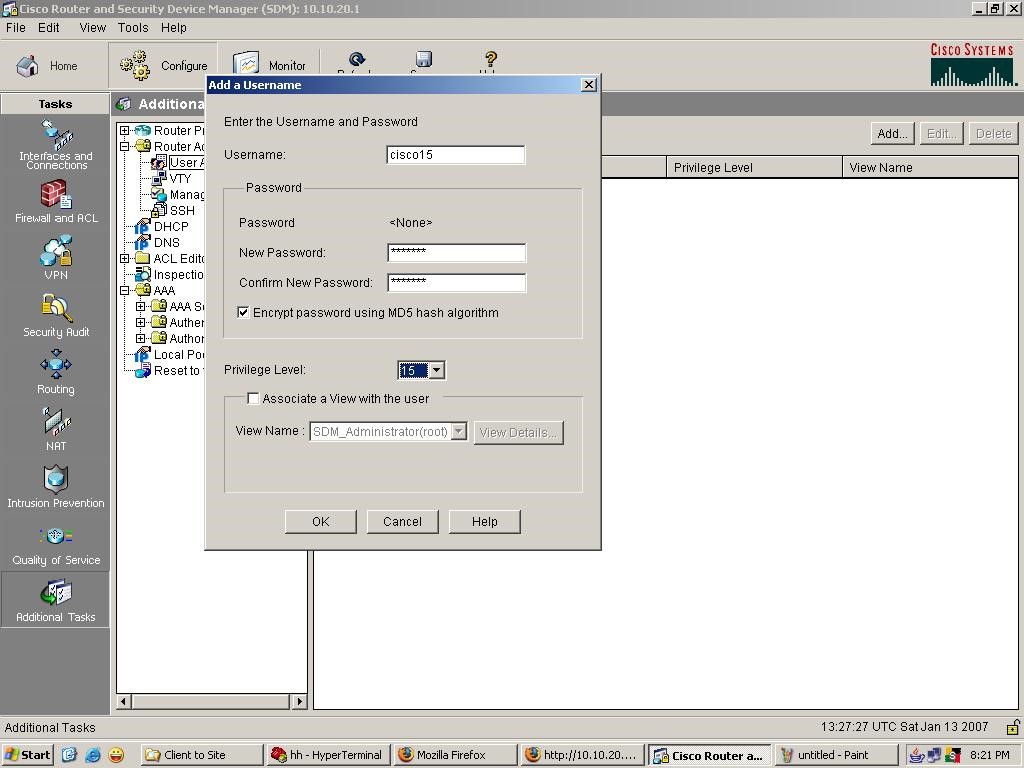
Bước 4: Tạo user cisco15 (mode 15)

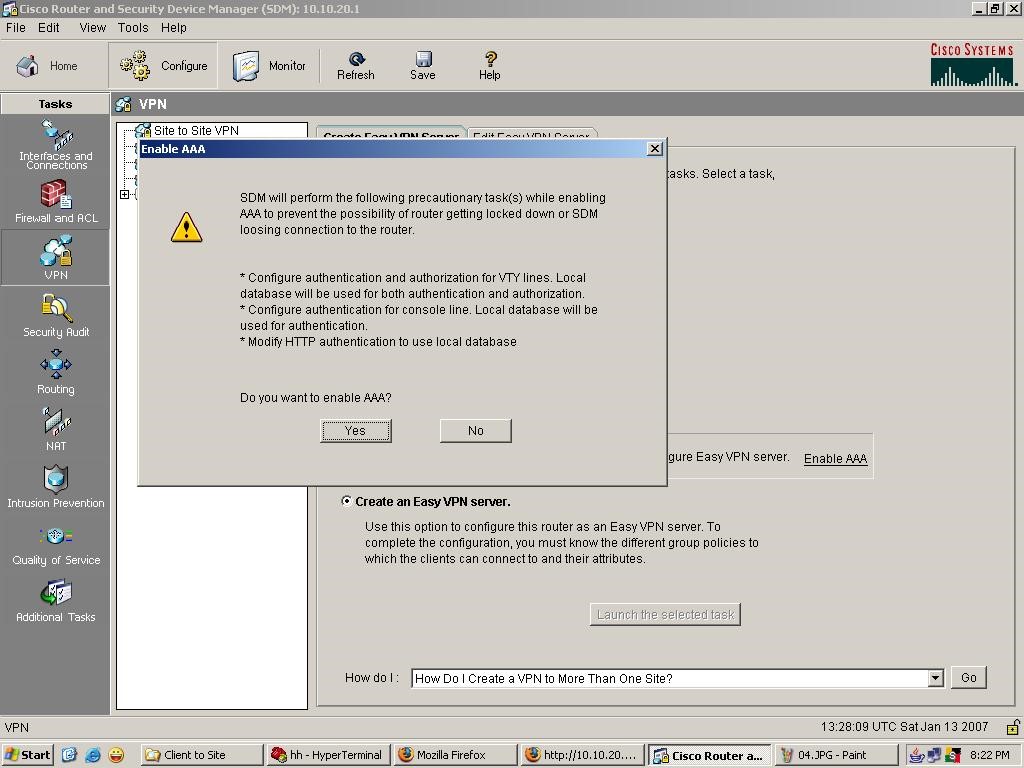
Bước 5: Enable AAA Server


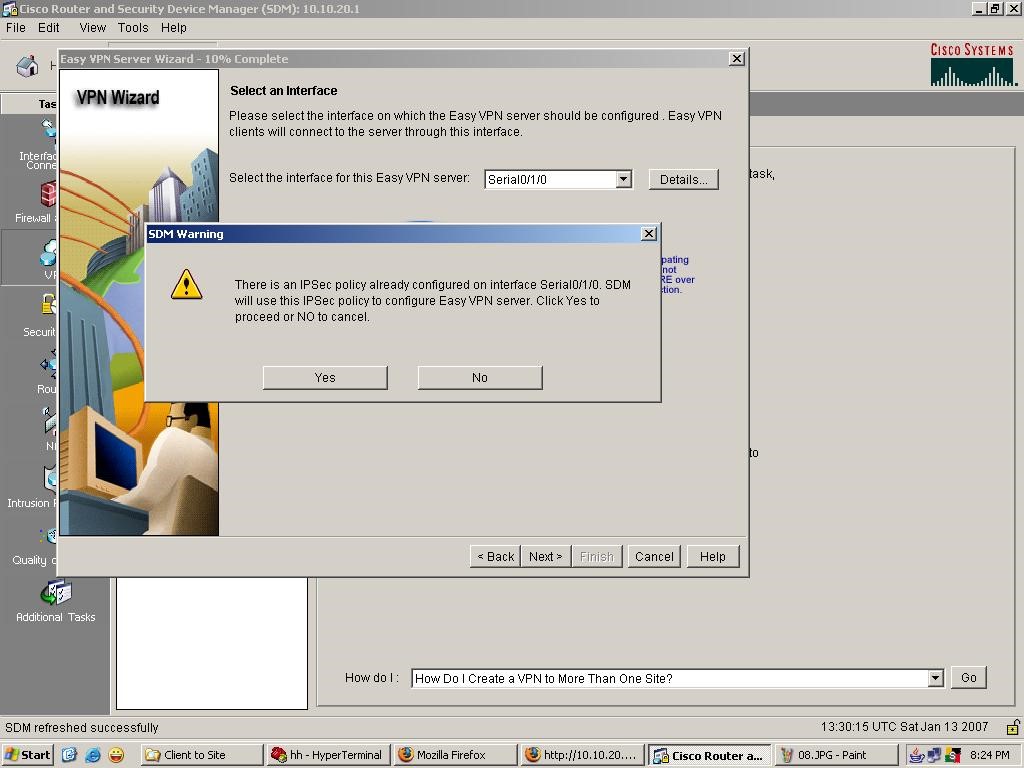
Bước 8: Chọn Interface mà VPN sẽ được cấu hình cho VPN client kết nối

Bước 9: Thông báo đã có sẵn 1 IP Sec policy Site to Site

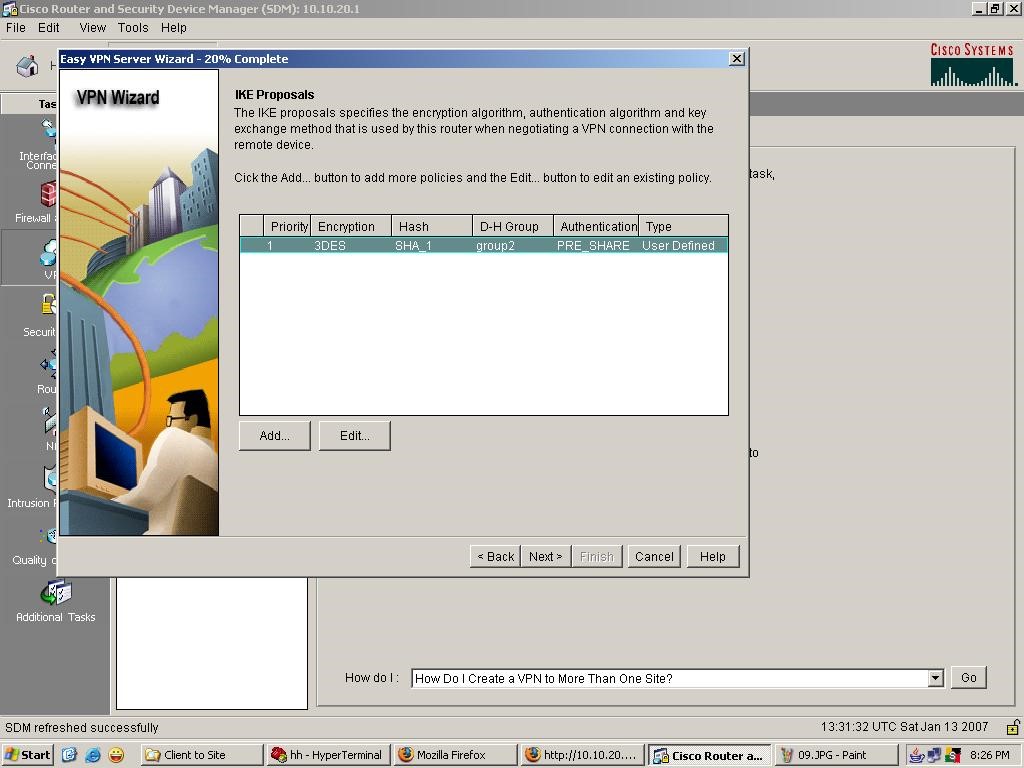
Bước 10: Summary các IP Sec đã có sẵn
 Bước 11:
 Bước 12: Chọn Group Authorization trên Local
 Bước 13: Authentication Local
 Bước 14: Tạo Group – Pre-Shared key – IP Pool … cho VPN client
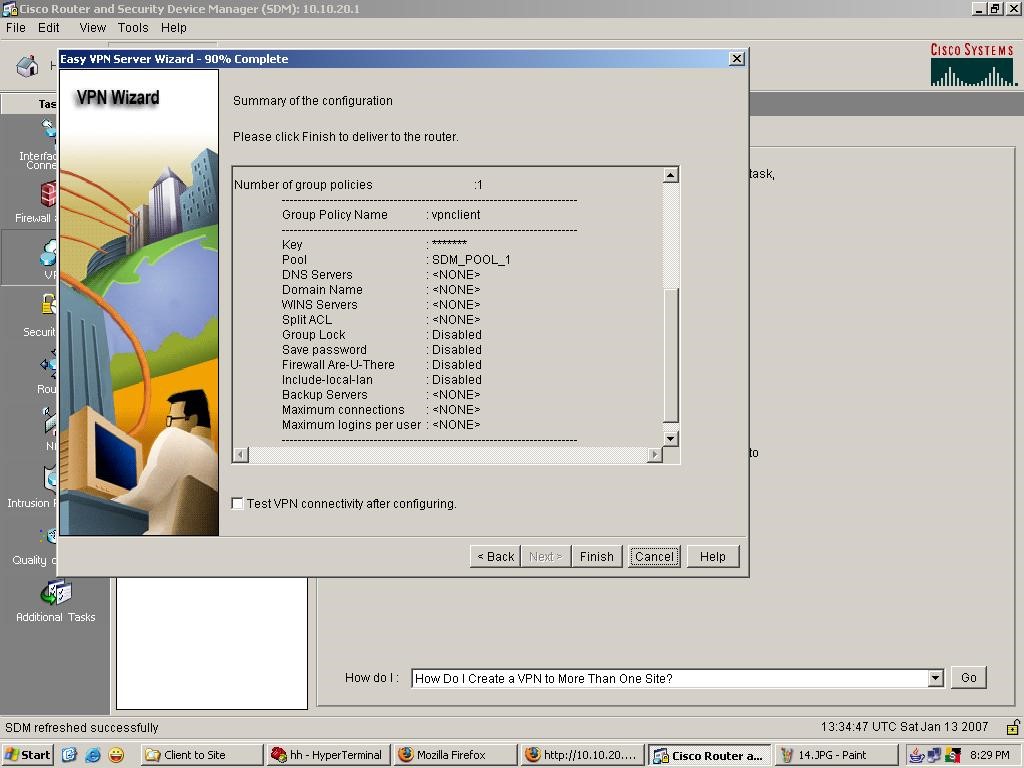
 Bước 15: Hoàn tất cấu hình VPN Client to Site

Building configuration…
Current configuration : 1551 bytes
!
version 12.3
service timestamps debug datetime msec
service timestamps log datetime msec
no service password-encryption
!
hostname R2
!
boot-start-marker
boot-end-marker
!
enable password cisco
!
no aaa new-model
!
resource policy
!
mmi polling-interval 60
no mmi auto-configure
no mmi pvc
mmi snmp-timeout 180
ip subnet-zero
ip cef
!
!
no ip dhcp use vrf connected
!
!
no ip domain lookup
no ip ips deny-action ips-interface
!
no ftp-server write-enable
!
!
crypto isakmp policy 1
hash md5
authentication pre-share
crypto isakmp key 6 cisco123 address 192.168.1.1
crypto isakmp keepalive 30 5
no crypto isakmp ccm
!
!
crypto ipsec transform-set myset esp-3des esp-md5-hmac
!
crypto dynamic-map mymap 10
set transform-set myset
!
!
crypto map mainmap 1 ipsec-isakmp dynamic mymap
!
!
!
interface Loopback0
ip address 192.168.255.1 255.255.255.0
interface Loopback1
ip address 2.2.2.2 255.255.255.255
interface FastEthernet0/0
ip address 192.168.1.2 255.255.255.0
duplex auto
speed auto
crypto map mainmap
interface FastEthernet0/1
no ip address
shutdown
duplex auto
speed auto
!
ip classless
ip route 0.0.0.0 0.0.0.0 192.168.1.1
!
!
ip http server
no ip http secure-server
!
!
control-plane
!
line con 0
logging synchronous
line aux 0
line vty 0 4
no login
warm-reboot
end
Bước 1: Kích hoạt VPN Client to Site ( phải enable AAA Server)
 Bước 2:
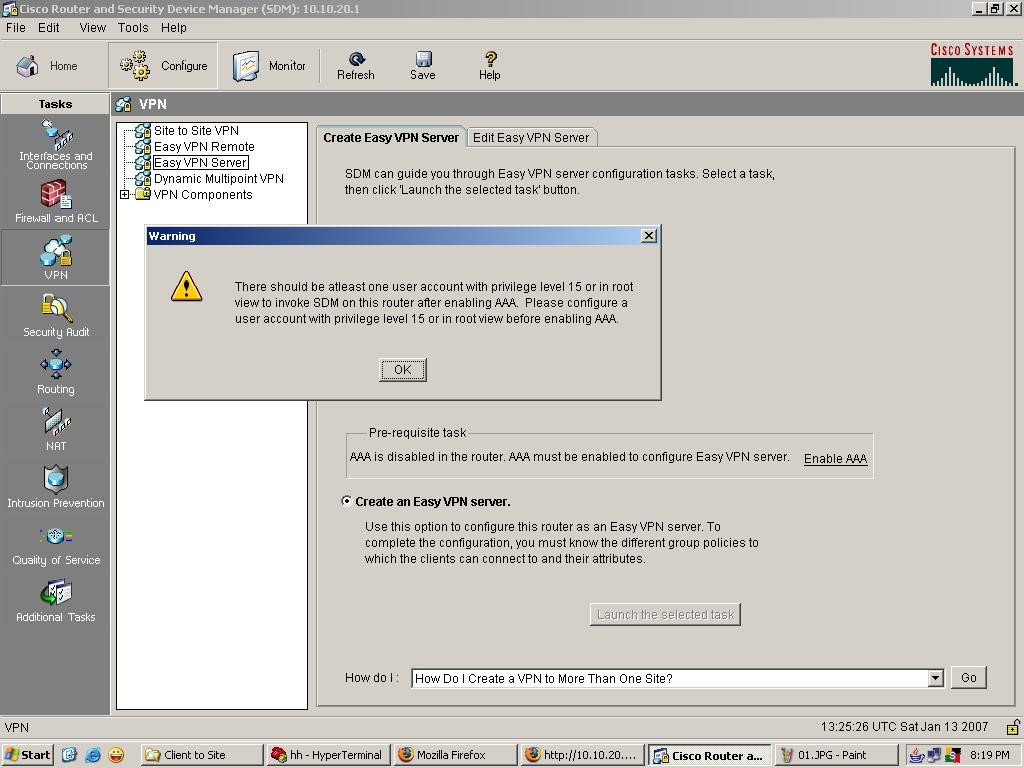 Bước 3: Tạo ít nhất 1 user mode 15 (để kích hoạt AAA Server)
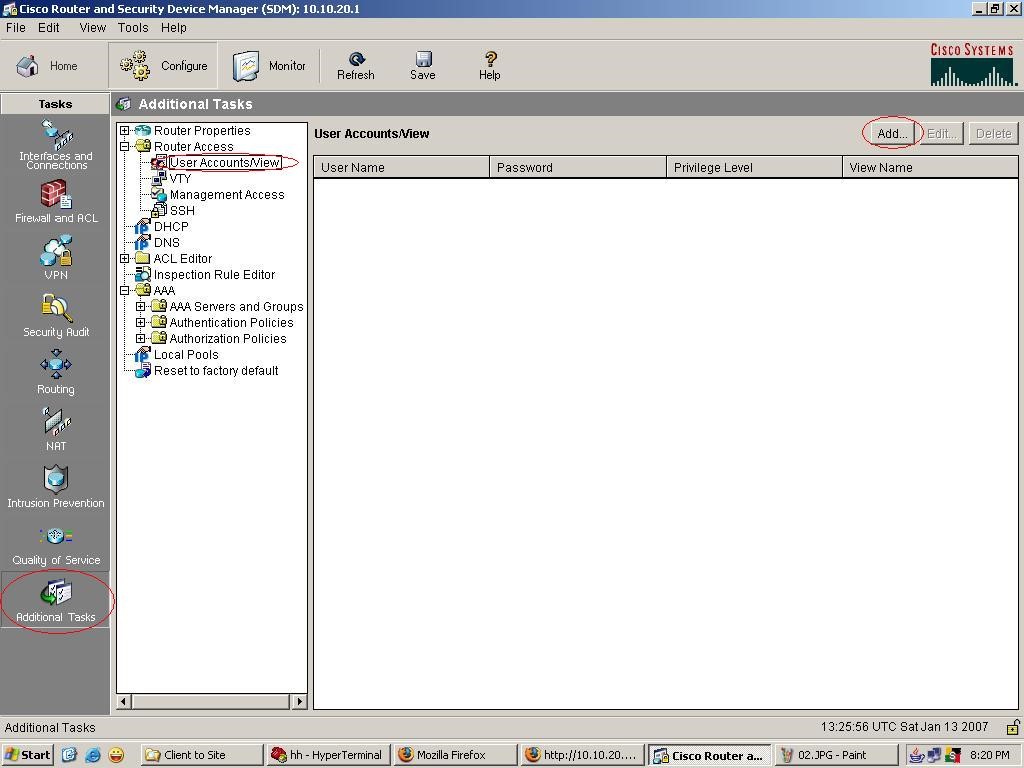
Bước 4: Tạo user cisco15 (mode 15)
Bước 5: Enable AAA Server
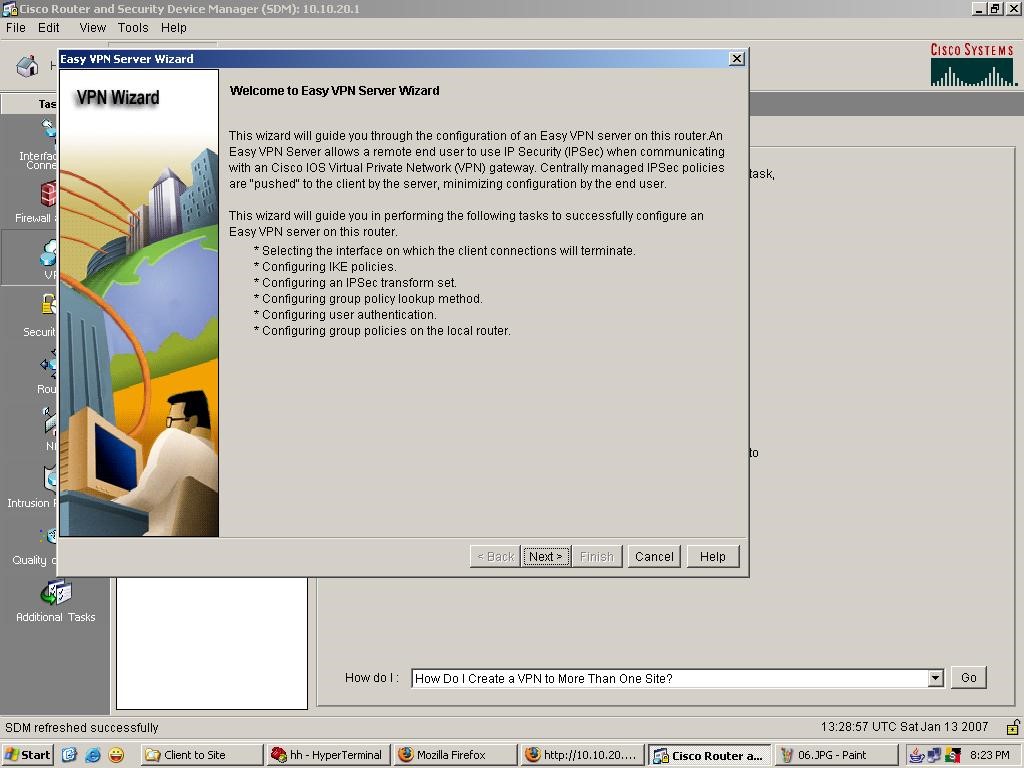
Bước 6: Enable hoàn tất.
Bước 7: Bắt đầu tạo VPN Server
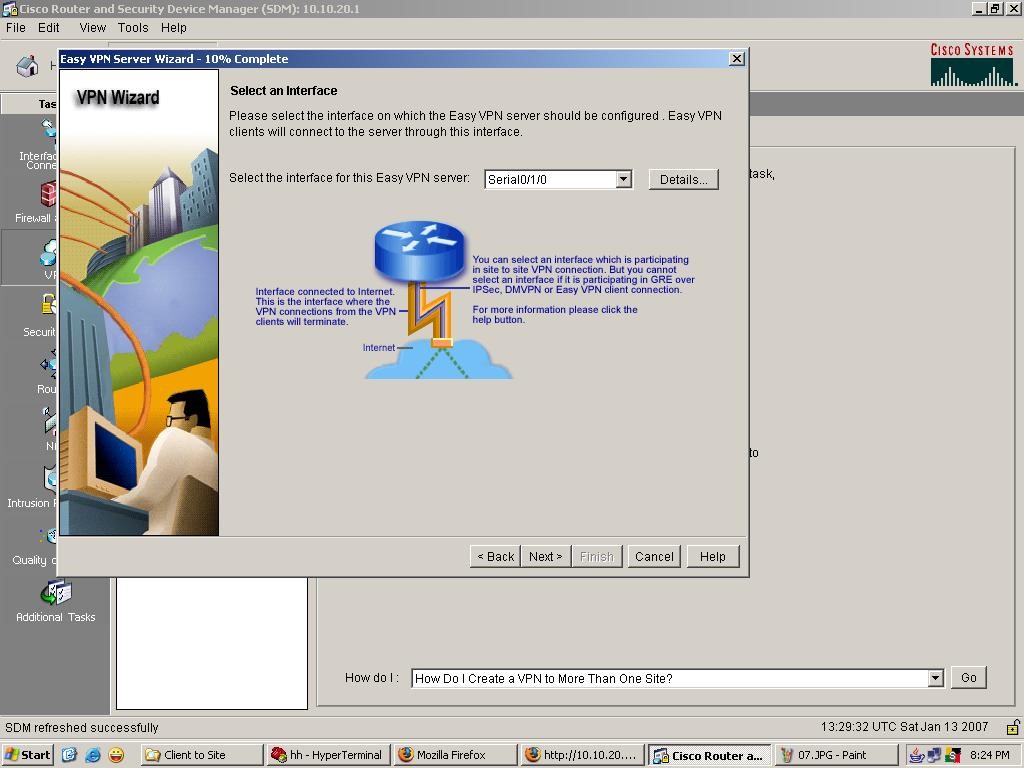
Bước 8: Chọn Interface mà VPN sẽ được cấu hình cho VPN client kết nối
Bước 9: Thông báo đã có sẵn 1 IP Sec policy Site to Site
Bước 10: Summary các IP Sec đã có sẵn
 Bước 11:
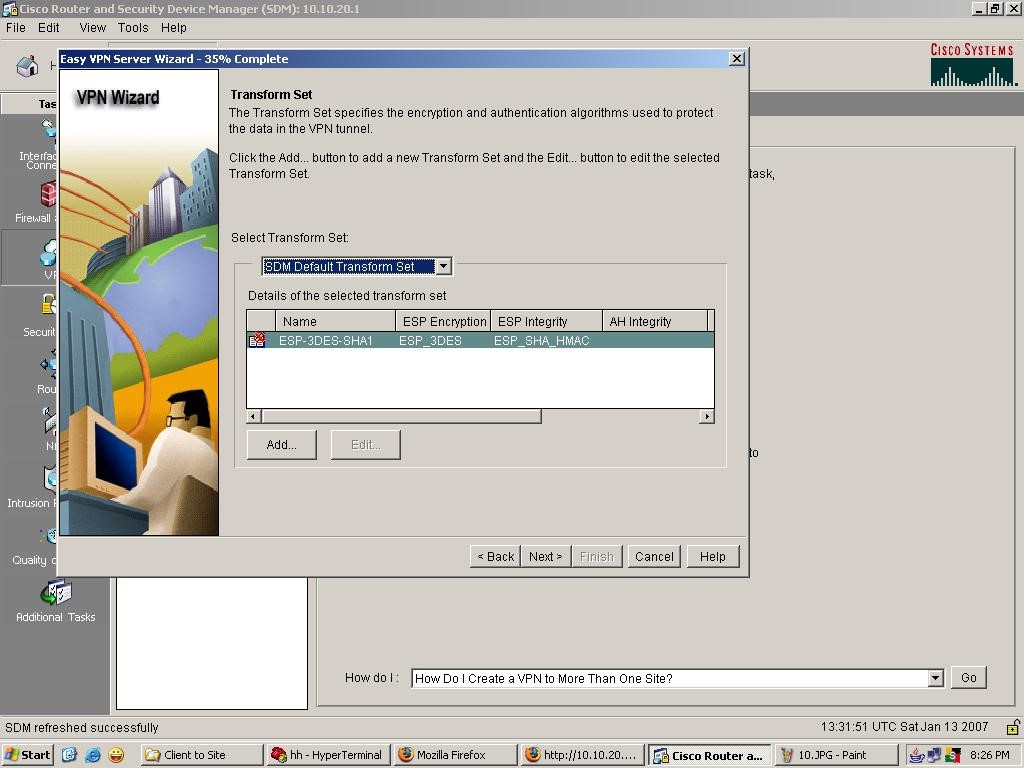 Bước 12: Chọn Group Authorization trên Local
 Bước 13: Authentication Local
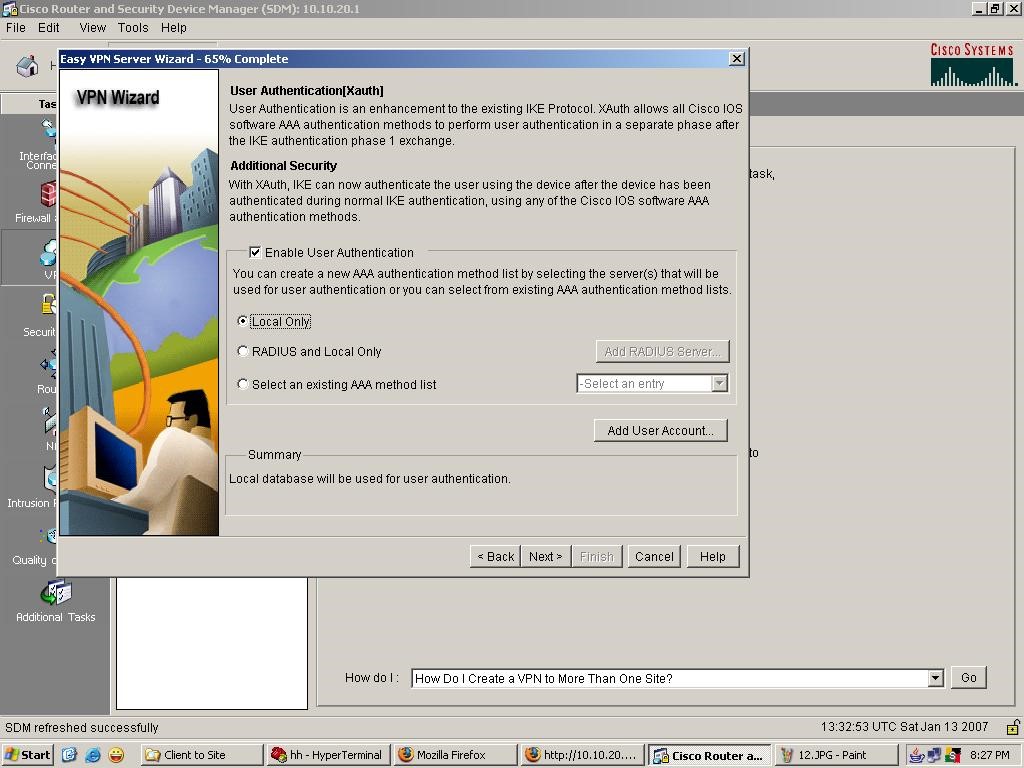 Bước 14: Tạo Group – Pre-Shared key – IP Pool … cho VPN client
 Bước 15: Hoàn tất cấu hình VPN Client to Site